How to modify a webcam
This is a modification of a cheap webcam, the TP-Link TL-SC3430 H.264 Megapixel Surveillance Camera, so
#1 it can be supplied with power via the LAN cable, and
#2 it gets an illumination-LED that can be controlled via the web-interface.
This is the webcam, that can be bought for 150DKKr at BN-elektronik.
When connected to your network, it can be controlled and viewed with a normal browser (also on your phone) and it even has a built-in server that can record and trigger on motion. It also has a built-in microphone and you can talk back when you use Messenger.

The front and bottom have the following functions:


After the modification, we have these improvements:
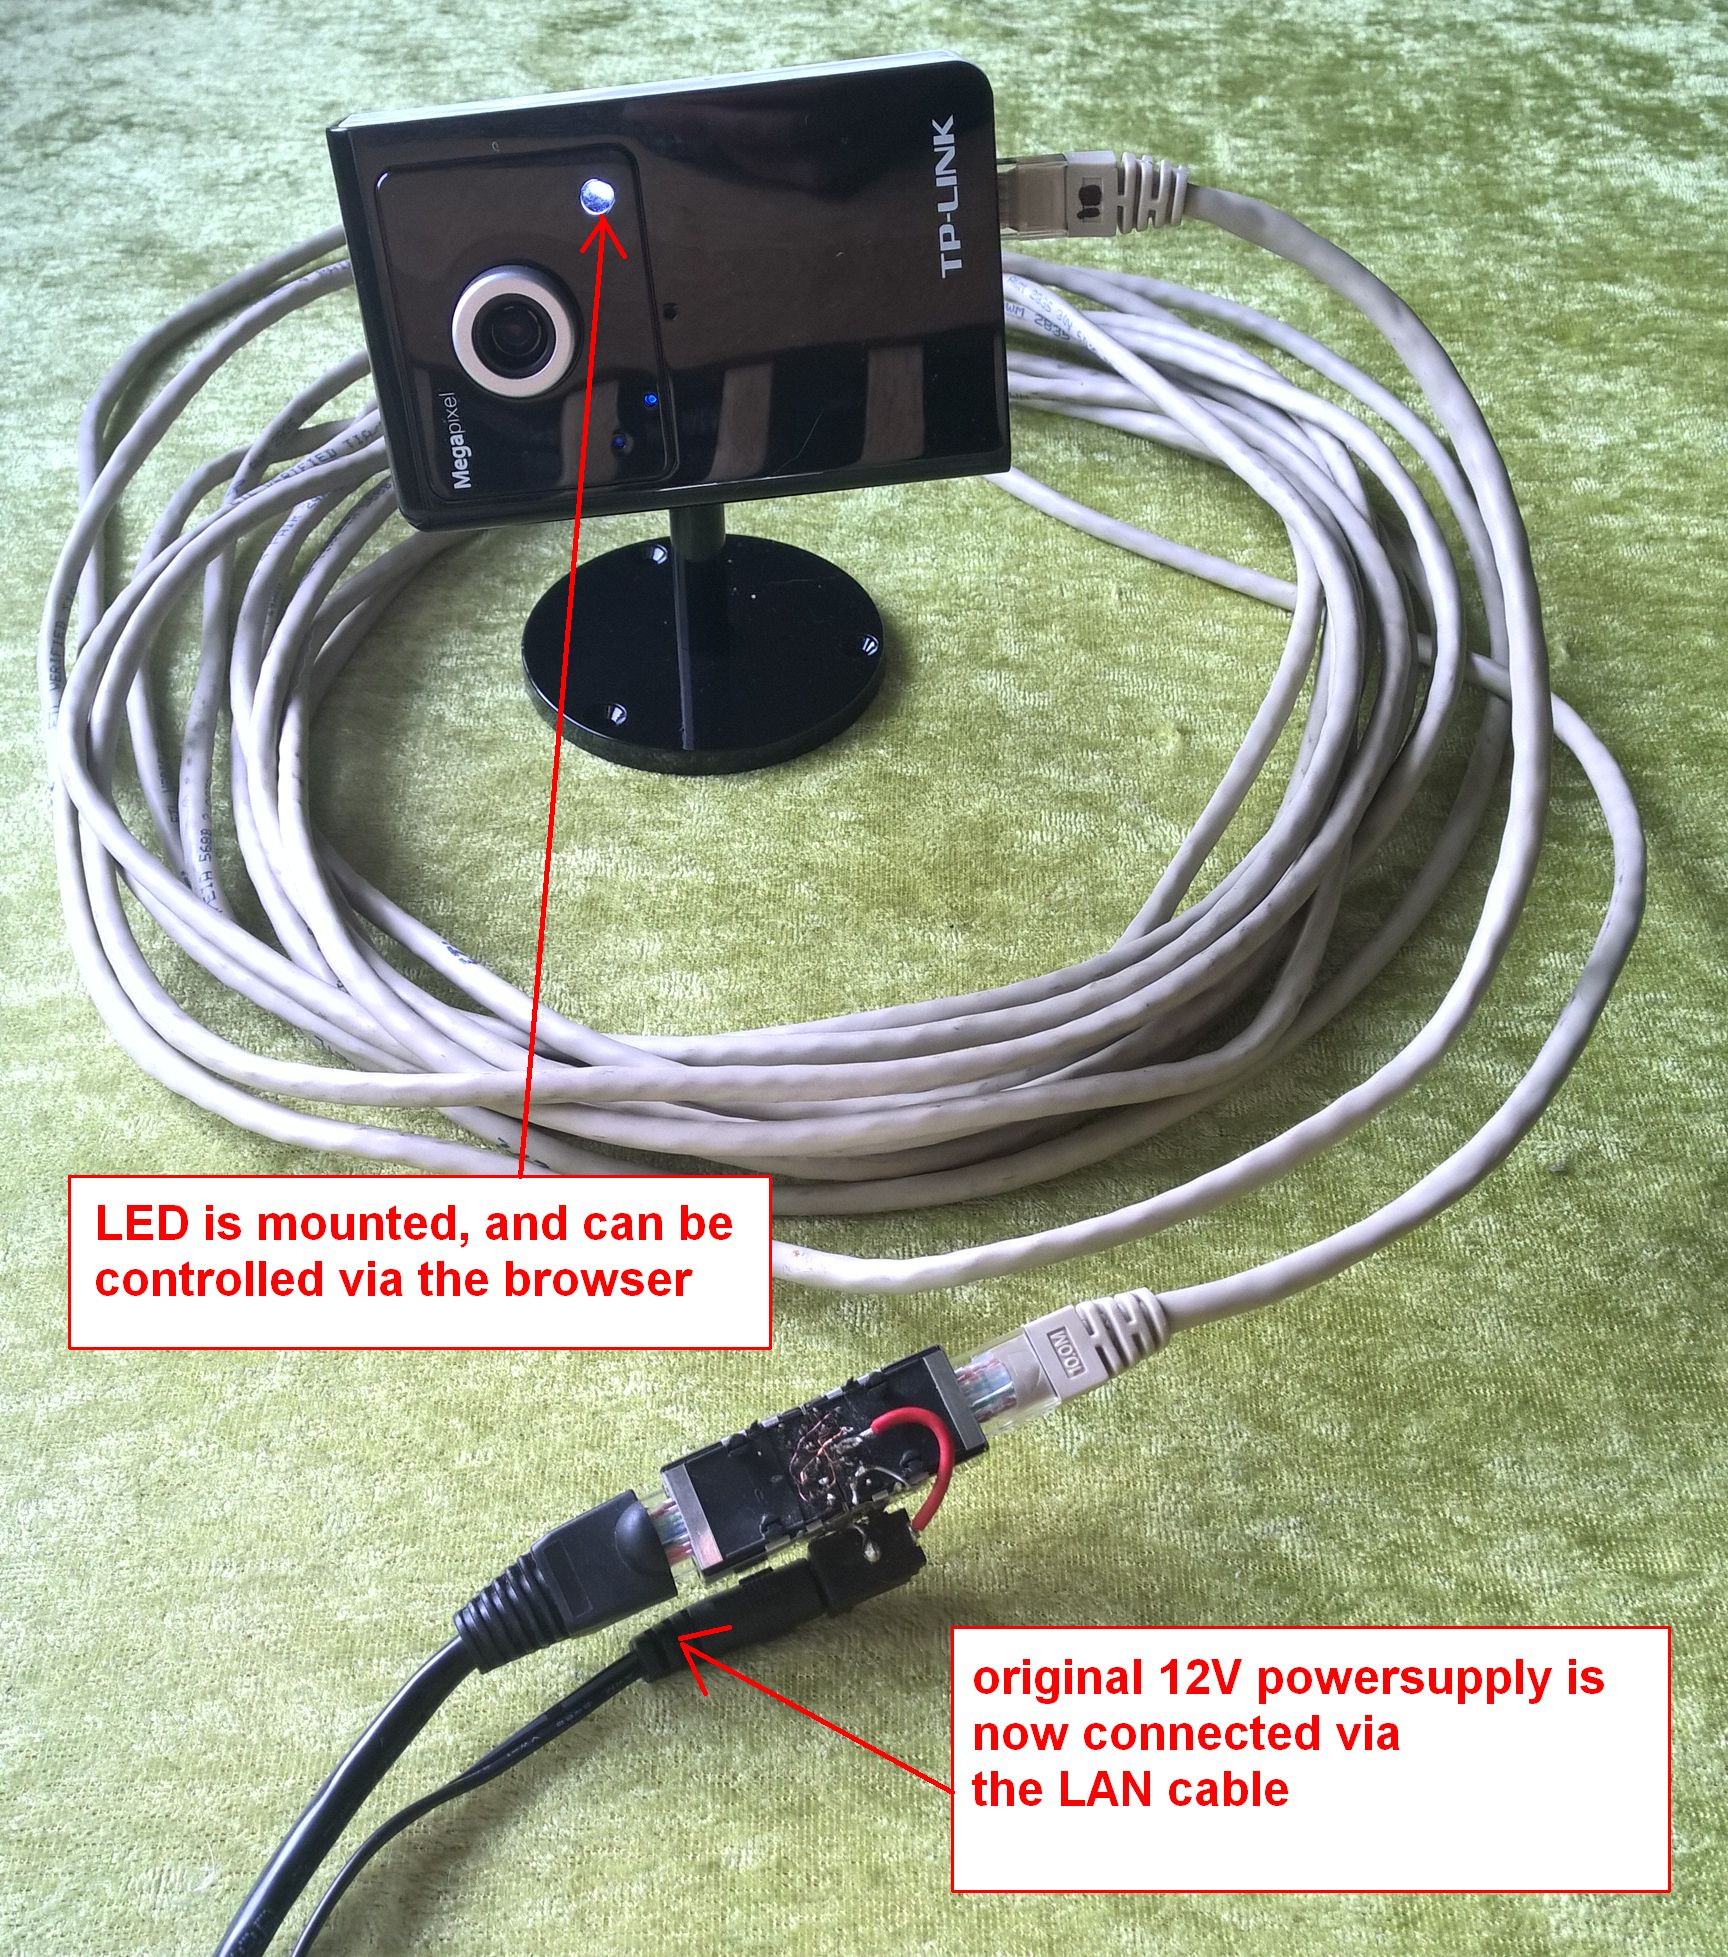
Modification of power supply:
When we mount the webcam on some remote spot, it is very impractical that a powersupply should be connected directly to it.
Since only 4 wires of the LAN cable are used for the network connection, we can make a modification to use PoE (Power Over Ethernet), where we use the remaining 4 wires of the LAN cable for the powersupply.
Some voltage drop that resuts from a long LAN cable is no problem for this webcam, since it has 3 internal switchmode supplies. Everything works fine even below 9V.
A simple power injector can be made from two LAN connectors soldered back-to-back (I used two 10-pin connectors with metal shields).
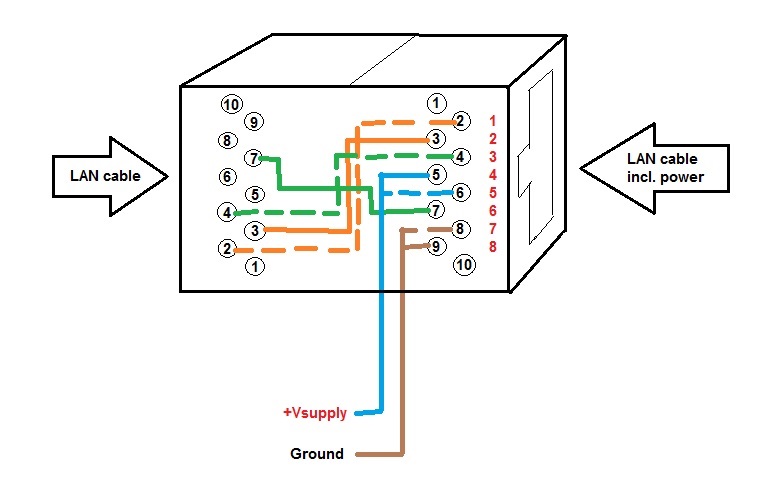
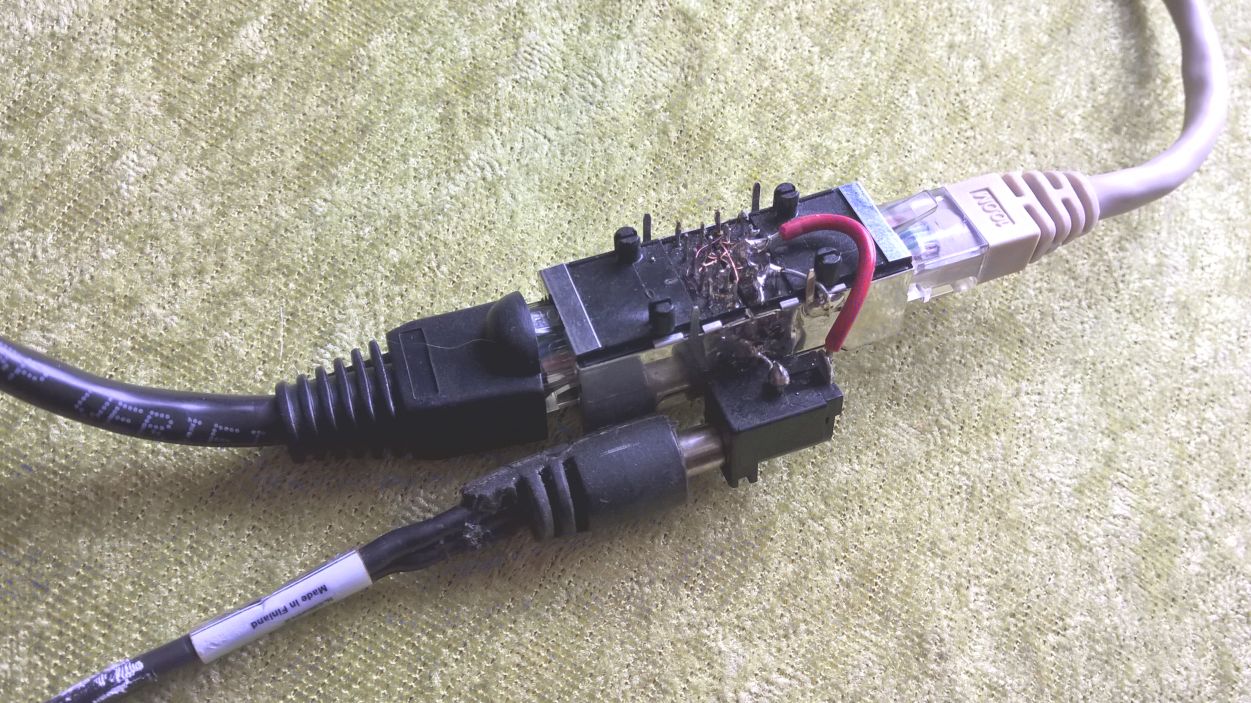
Gaffa-tape was later wrapped around the injector to encapsulate the connections.
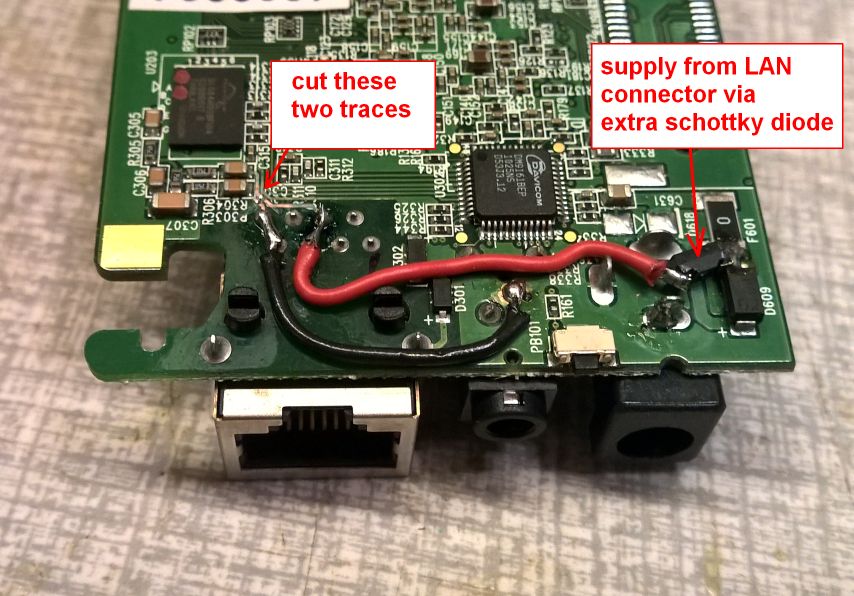
It looks like the unused LAN pins can have some hidden functionality, since they are connected to some resistors and capacitors on the board, but since this functionality is not available with the TL-SC3430, we can just cut those tracks.
Solder a ground wire from LAN connector pins 7 and 8, and a plus wire from LAN connector pins 4 and 5.
It is a good idea to place a diode in series with the plus, so both supply inputs can be used and it also is protected against wrong polarity.
Addition of illumination-LED:
When you access the webcam via the browser-interface, you will find a camera-settings menu that has a possibility to control a LED.
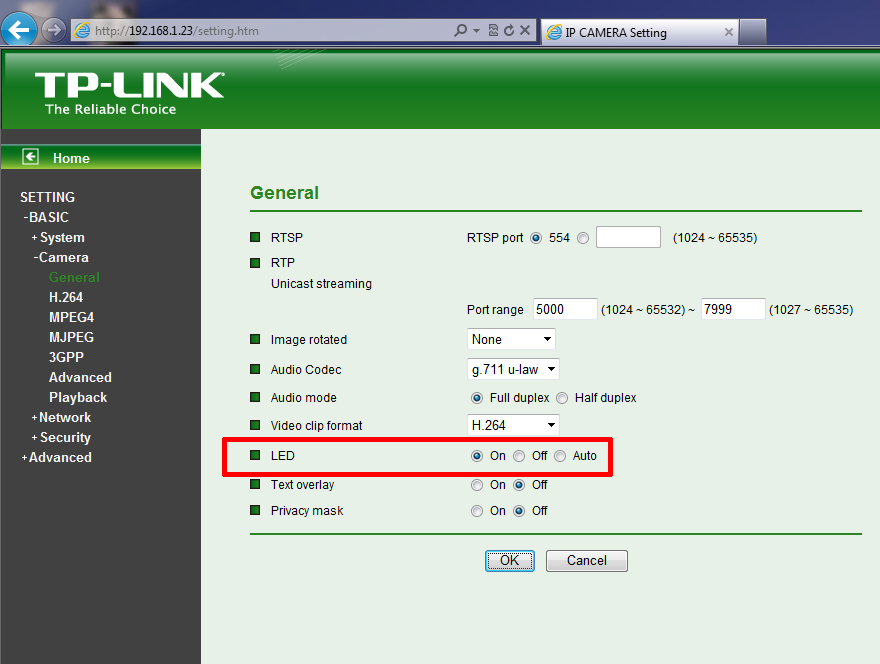
After some investigations, I found that there in fact was a signal that can be controlled with this setting.
It is 3.3V when the LED control is OFF, and 0V when it is ON.
In the TL-SC3430 this signal is just not used, but we can use it in this mod.
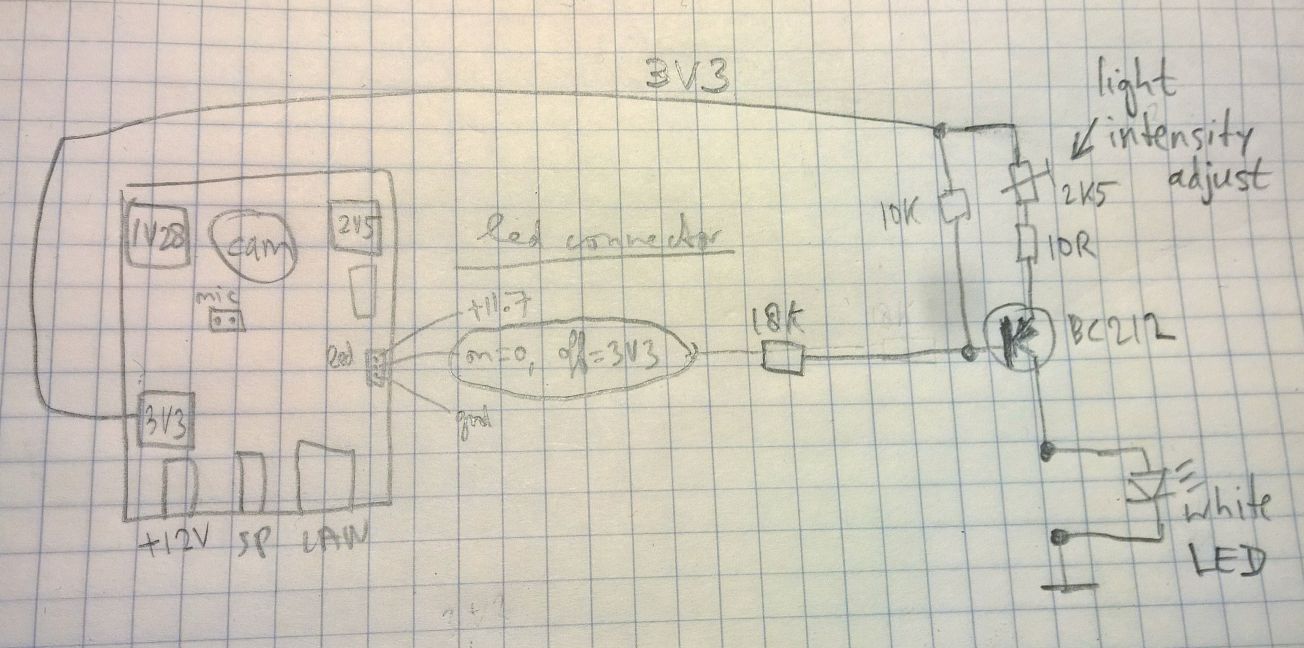
The following schematic shows how to use it to switch a LED.
The LED I used was taken from a defective bicycle light.
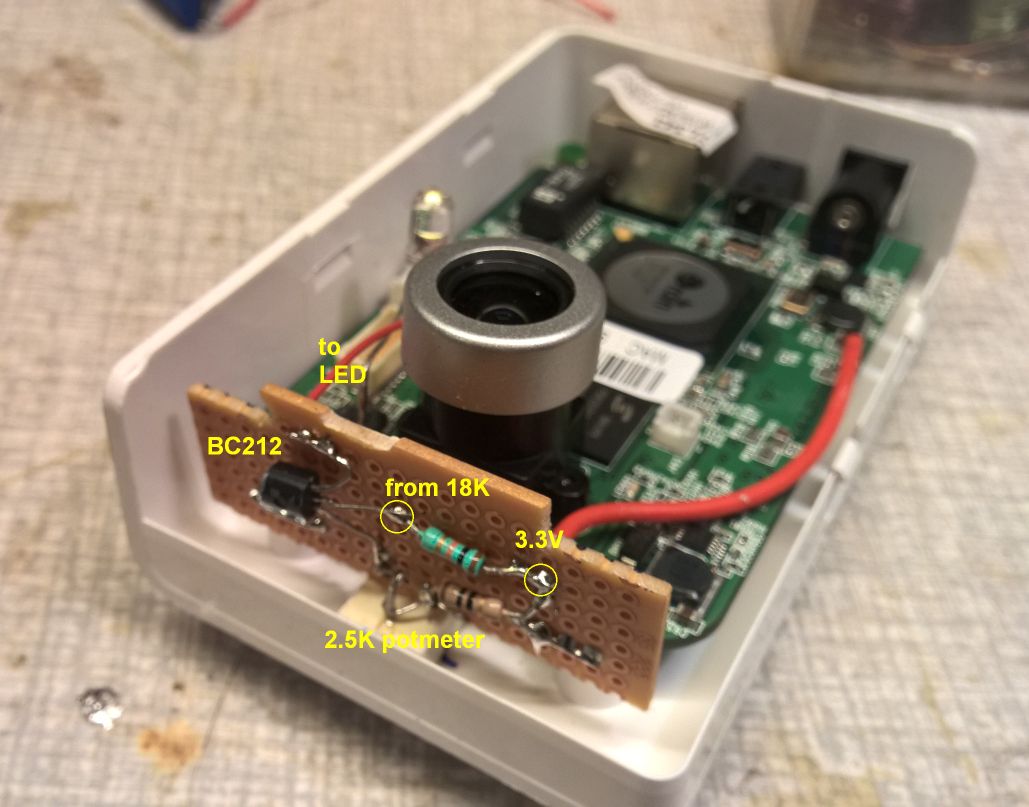
We have to add a current-source (5 to 25mA) with a pnp transistor, and use the 3.3V supply rail.
In this drawing, the left shows the webcam printed circuit board and the locations of the led-control connection and also the 3V3, 1V28 and 2V5 supplies, and the right shows the circuitry that has to be added:
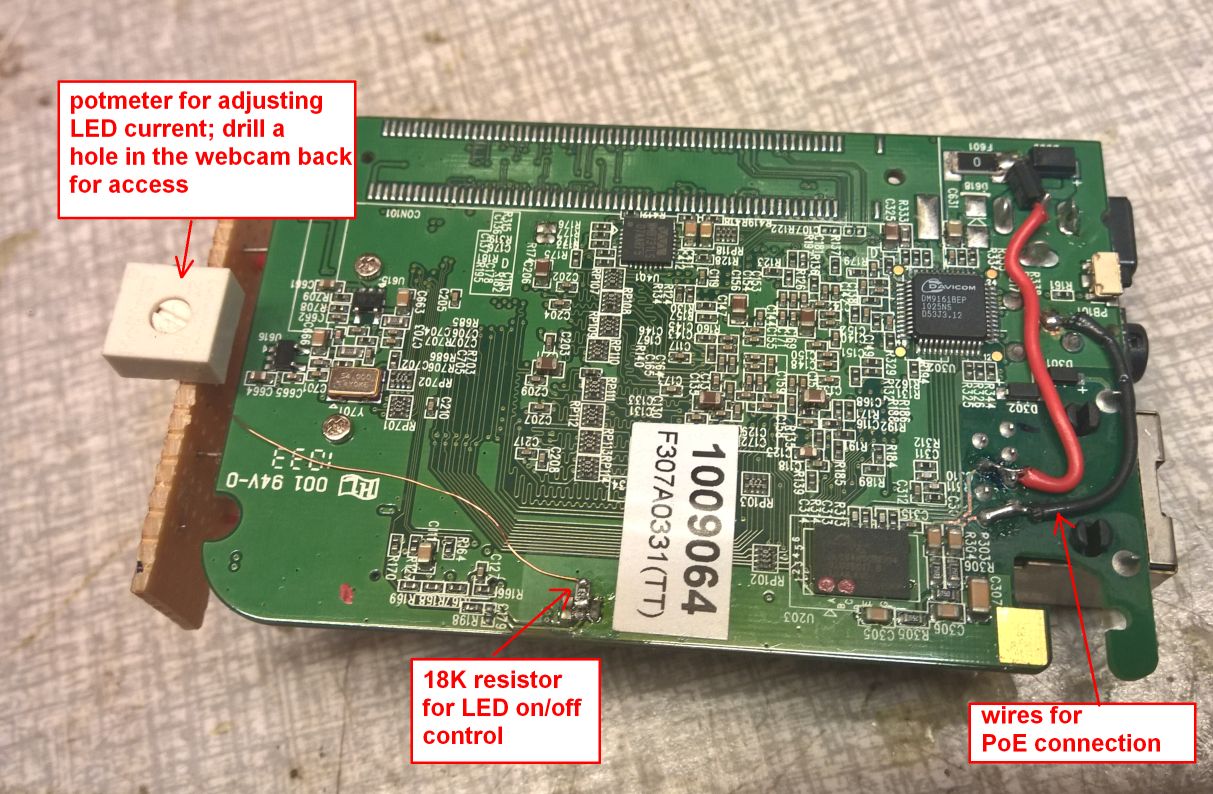
I mounted a little vero-board (held in place by two stiff ground-wires) with the transistor and potentiometer. The potentiometer can be accessable via a hole in the back of the webcam.
The 18k resistor is here mounted as a smd component on the backside of the webcam-board.
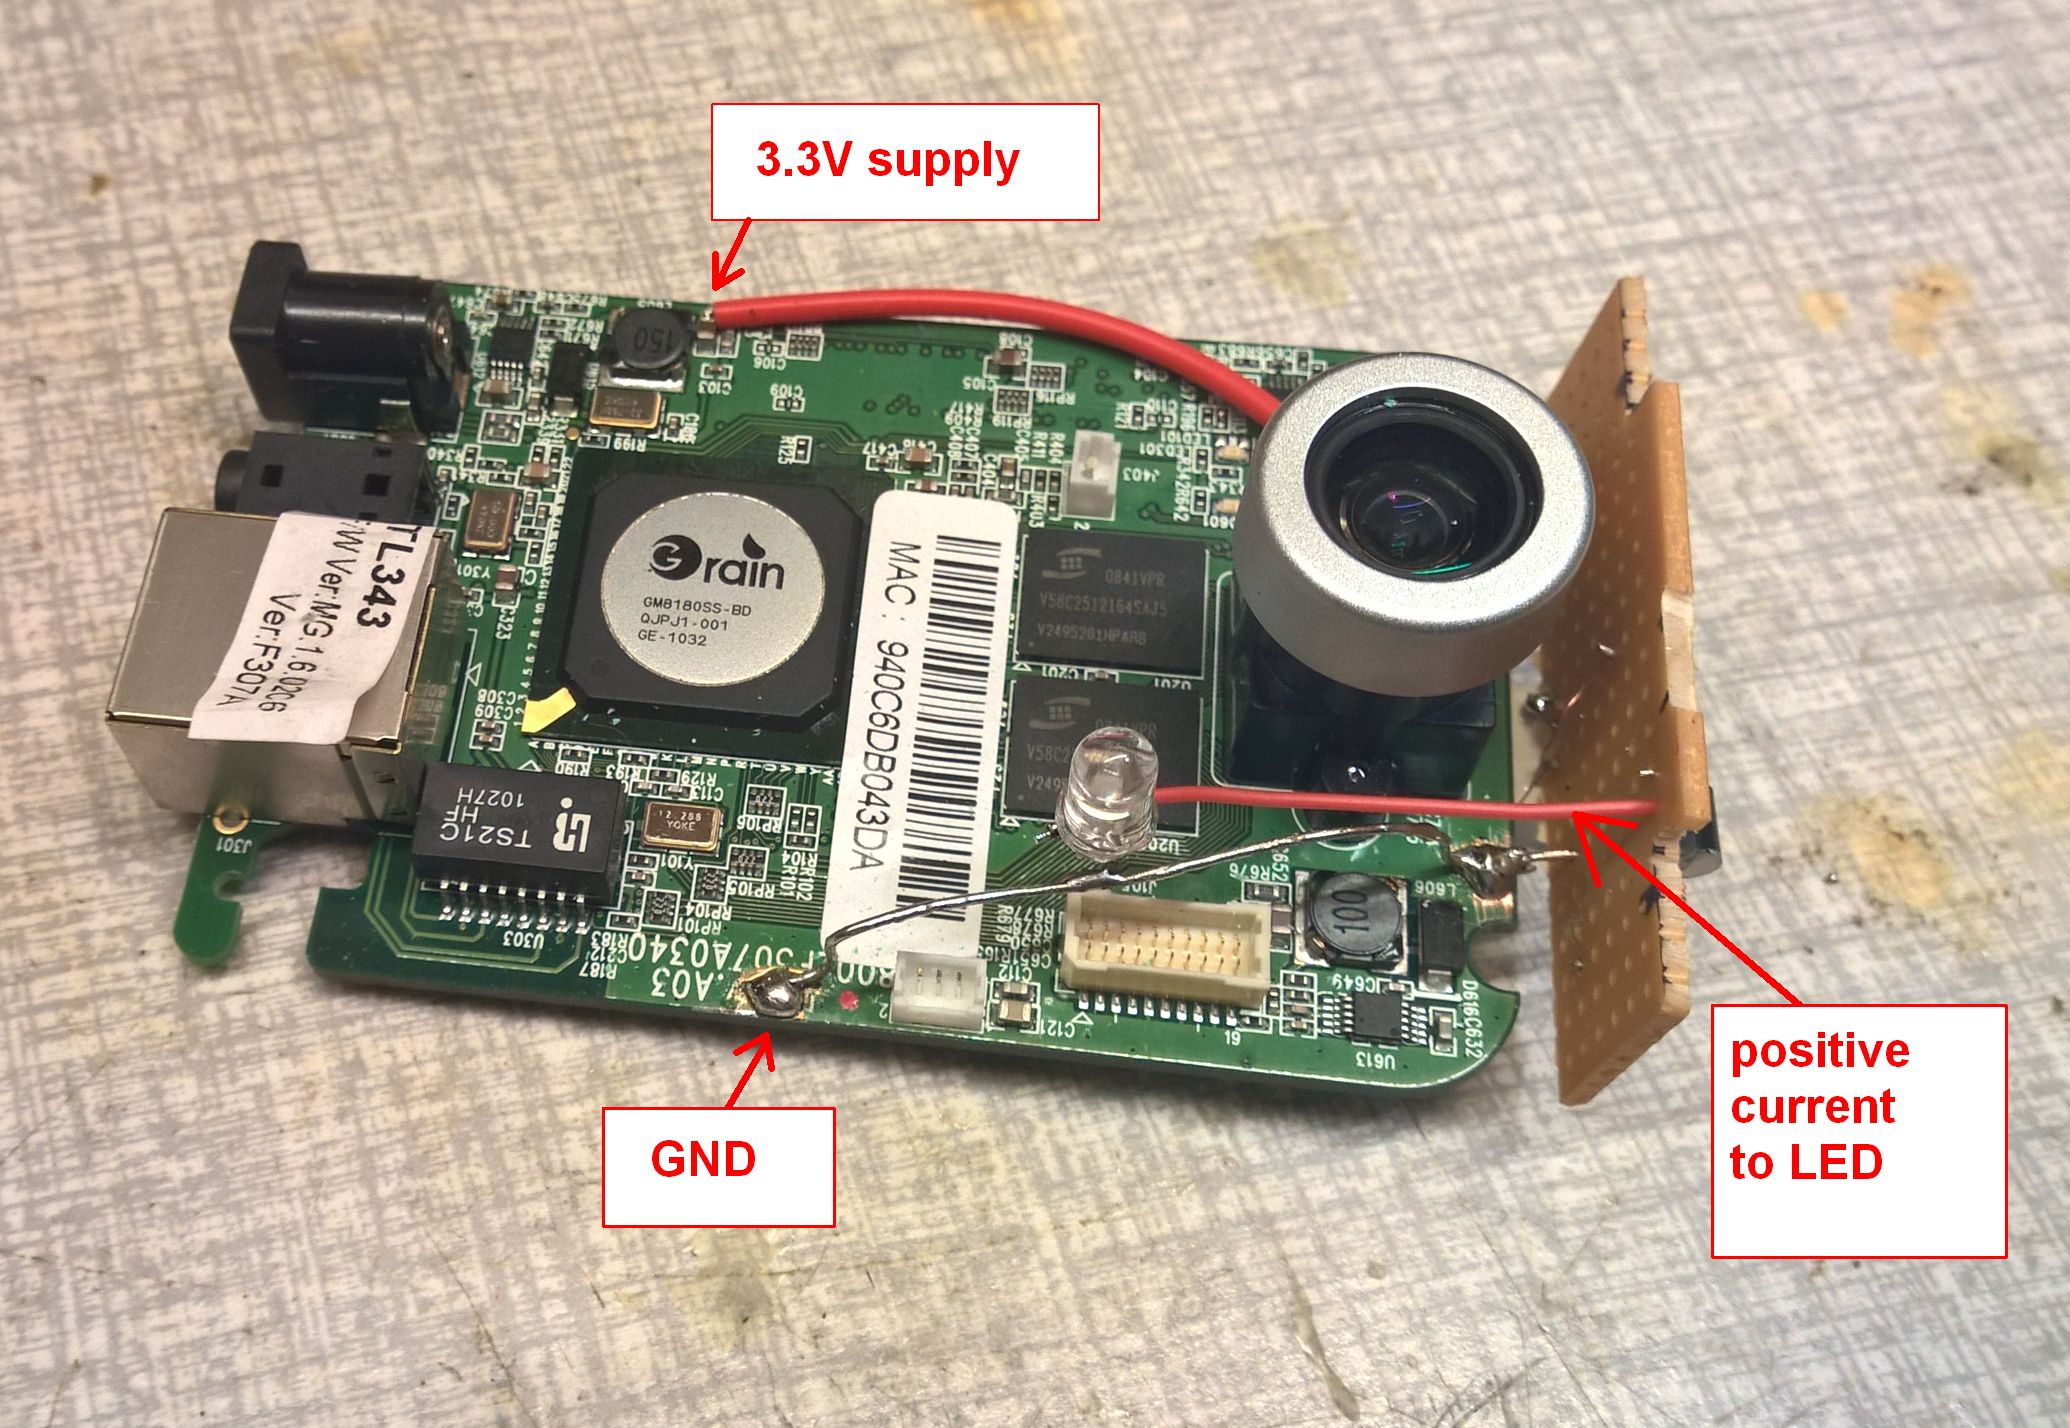
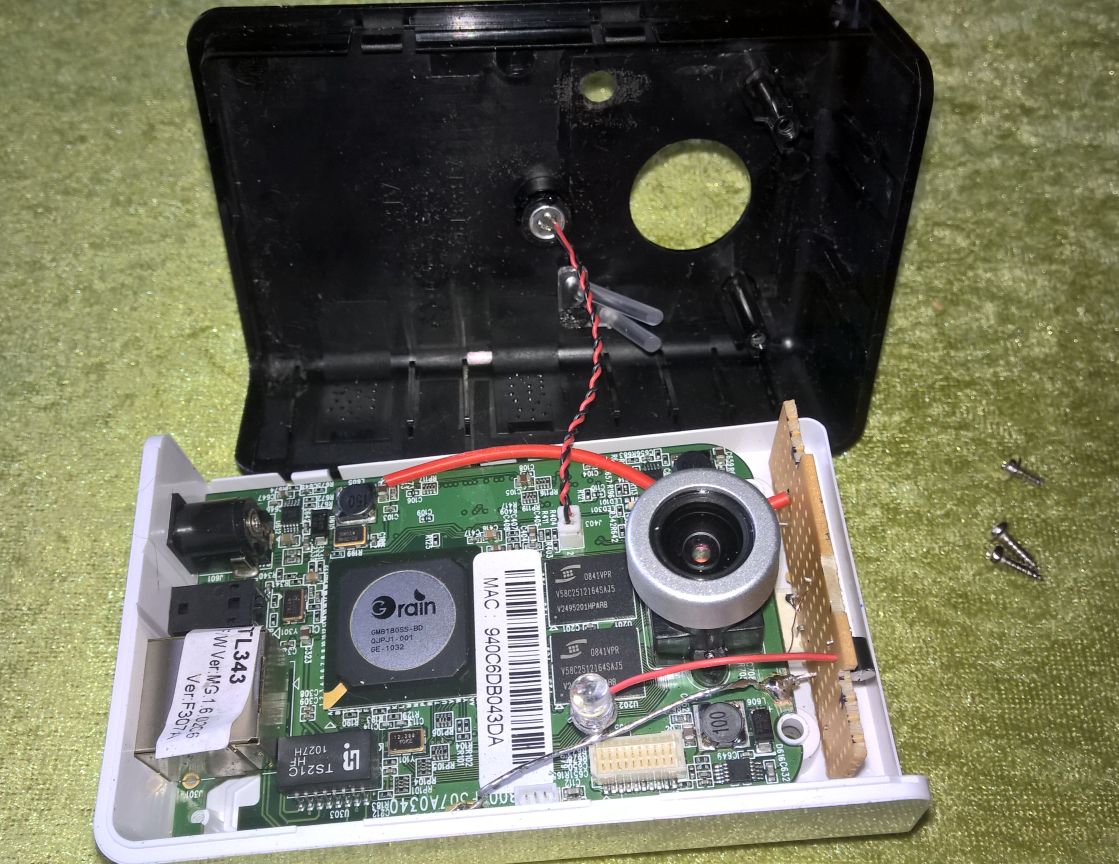
The LED is soldered on a thick ground-wire that functions as support. Drill a hole for it in the front of the webcam.
That's it!.
this page is made with Notepad2